Introduction
Google cloud storage is a service that enables you to store object in the cloud. But wait what is object? Simply object is a file be it a pdf, image, zip or anything else. Any kind of file that stored in the cloud will be called object.
And just like a file system in your operating system, you could also create a folder to group the files. In the operating system your file and folder are stored on a disk, disk are equivalent to a bucket in the google cloud storage.
Prerequisite
- Make sure NodeJS installed on your system
- Register a google cloud account
Diving In
Setup GCS Bucket
If this is the first time you open google cloud, you need to create a project first.
Assuming that you have your google cloud project, open the cloud console and open the left navigation menu. look for storage.
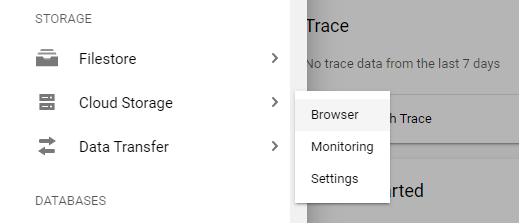
In the cloud storage menu click Browse
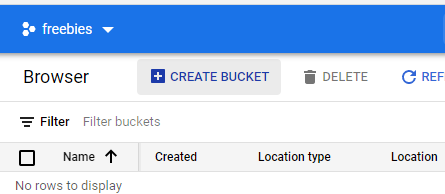
On the Cloud Storage page, click on Create Bucket in the top of the menu.
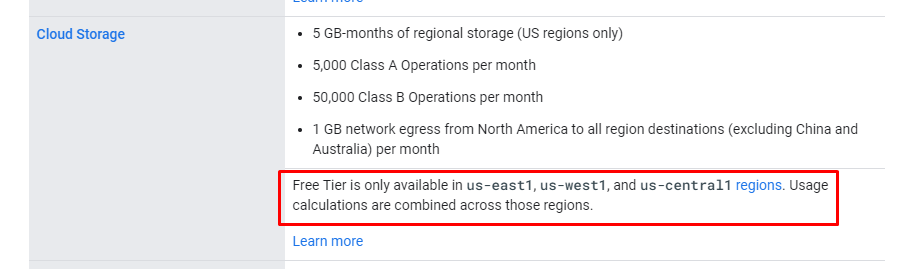
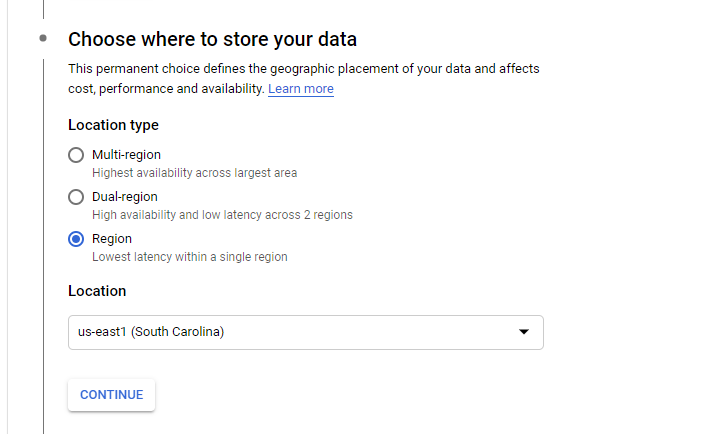
Next create the bucket, follow the steps provided and if you wanted to keep your storage free, make sure that you pick the right region. Here is the free tier information from google cloud.
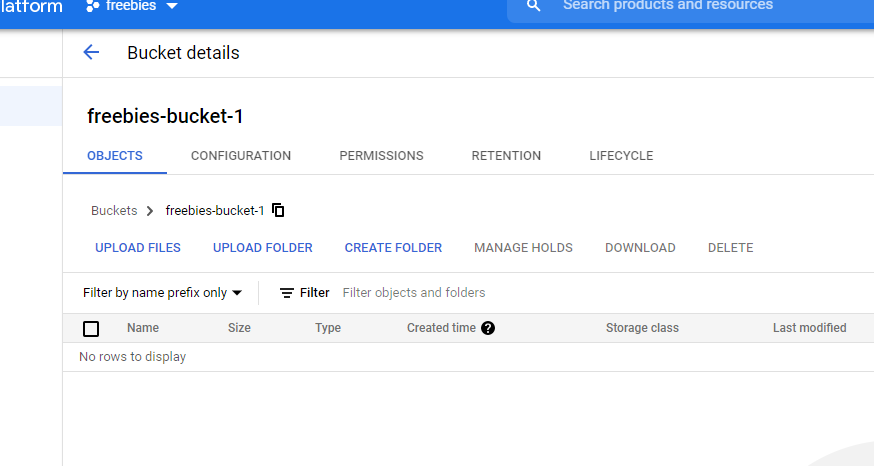
For the storage class, just pick Standard it suite our current use case, next for the access control pick Uniform. And in the optional setting just leave it as it is. After you click finish the bucket creation process. You should get something like this.
Manually Upload File To Bucket
In this section we will explore some basic of GCS, it is optional. You could skip to the code part if you wanted to.
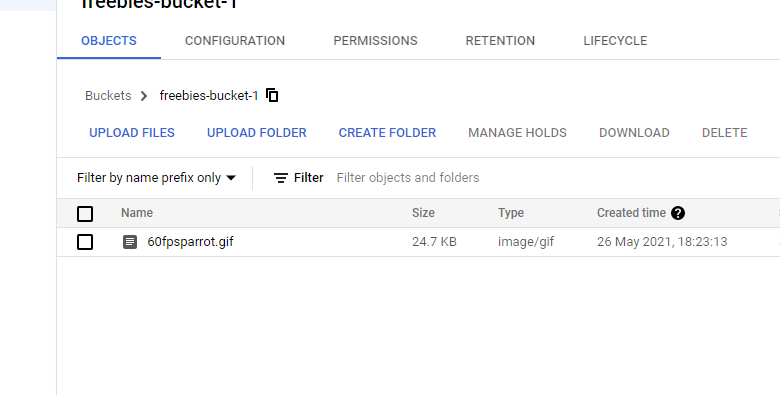
To upload a file manually to gcs, first click the Upload Files button.

Then simply pick the file that you wanted to upload, after you finish uploading the file you upload should appear on the bucket as seen below.
You could open the uploaded file details
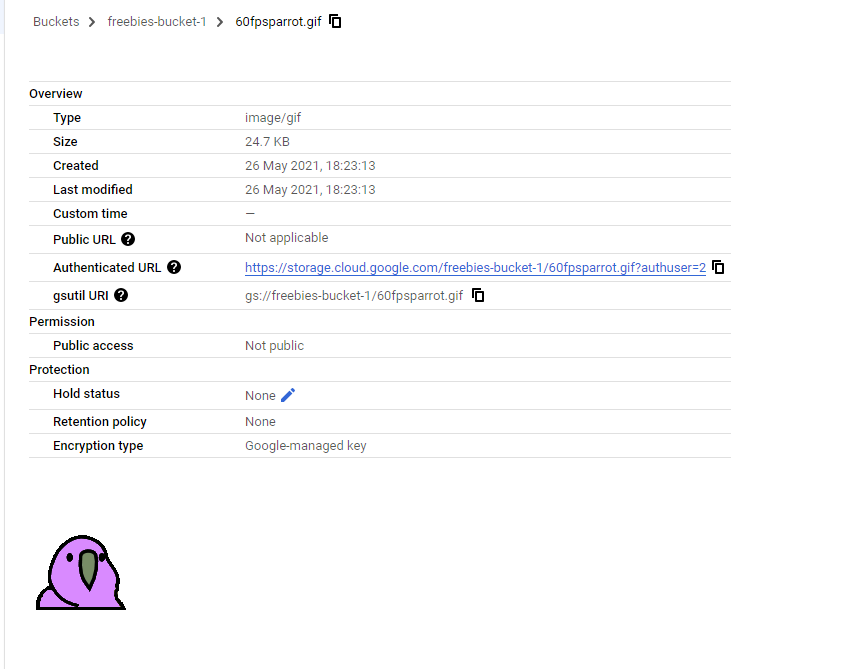
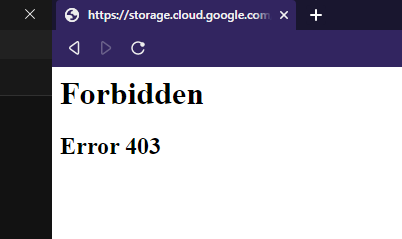
It will display an Authenticated URL This url is an endpoint where we can acess our file, currently the files are only available to authenticated user. If you tried to access it with unauthenticated user it will give you error.
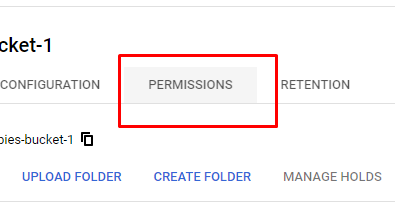
To enable public sharing, go to the google cloud storage dashboard and click on Permissions
Click on Add then create the following permission.
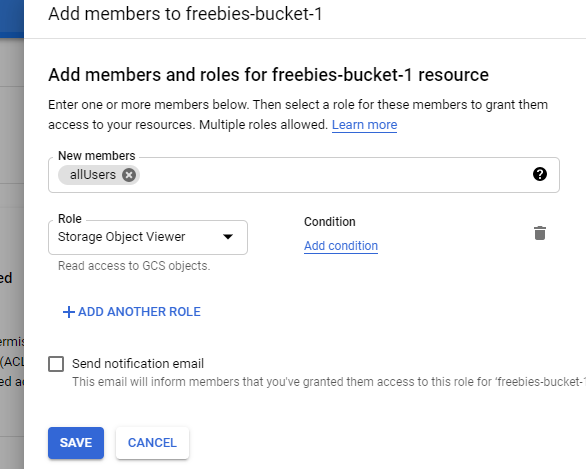
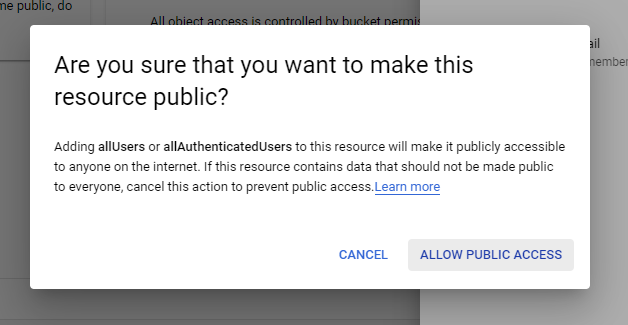
This permission will enable any user to see our files even if they are not authenticated. if you wanted to give access to only the authenticated user you could use allAuthenticatedUsers instead. you will be prompted about giving public access to the bucket, press Allow Public Access.
If you go to your object information again, you will have 2 kind of url public and authenticated.
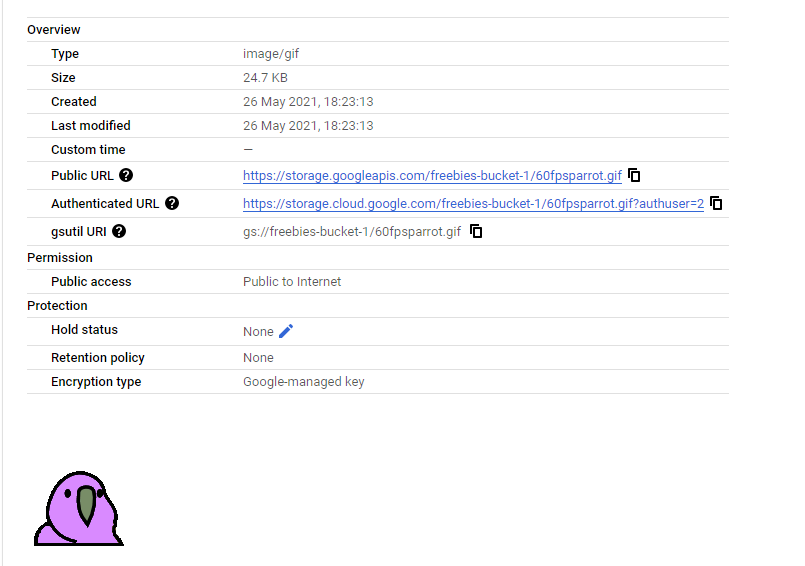
Now anyone can access the file from the public url.
NodeJS, ExpressJS and GCS
In this section we will create a web server using express and nodejs with an endpoint that upload file to the gcs.
Create a folder and do
npm init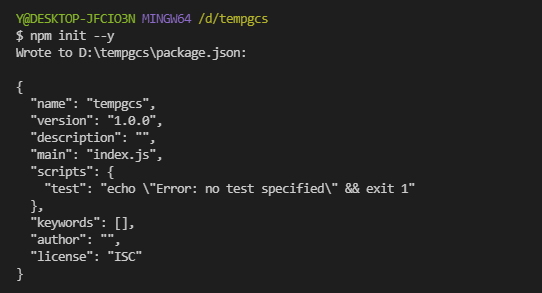
You could use
npm init --yto skip all the configuration and leave it default.Install the dependencies
npm i --save express @google-cloud/storage multerCreate
index.json the root of your project. Here we will initiate our express project and utilize multer middleware.const express = require('express') const multer = require('multer') const app = express() const multerMid = multer({ storage: multer.memoryStorage(), limits: { fileSize: 5 * 1024 * 1024, }, }) app.use(multerMid.single('file')) app.use(express.json()) app.use(express.urlencoded({extended: false})) app.post('/uploads', async (req, res, next) => { res.send("Uploads") }) app.use((err, req, res, next) => { res.status(500).json({ error: err, message: 'Internal server error!', }) next() }) app.listen(3030, () => { console.log(`Listening at port ${3030}`) })You could run the code using
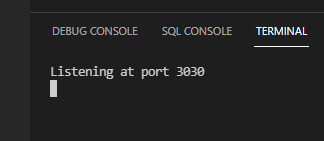
node index.jsthen try to request tolocalhost:3030/uploadsyou should get this return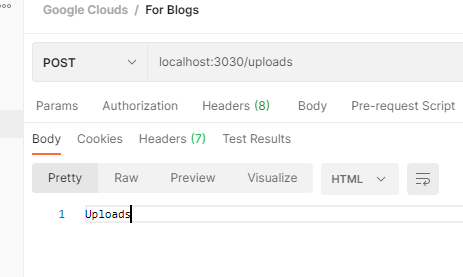
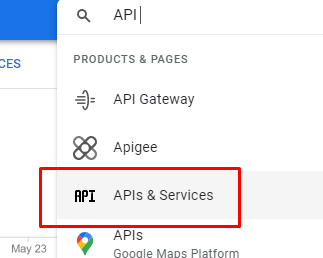
Next step is to setup google cloud service. first in the search bar on top look for API & Services.
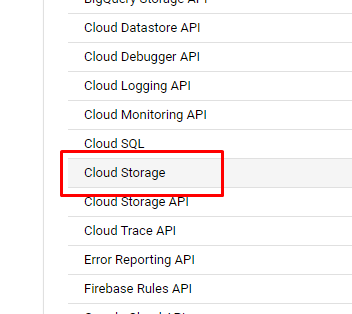
Scroll down and look for Cloud Storage
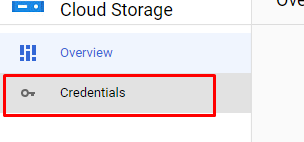
If the API is disabled, you should enable it first. to setup our service credential open the Credentials menu on the left bar.
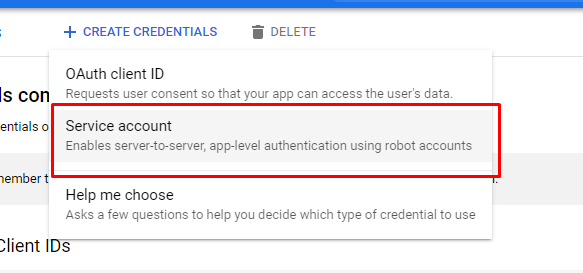
Then create a service account credentials.
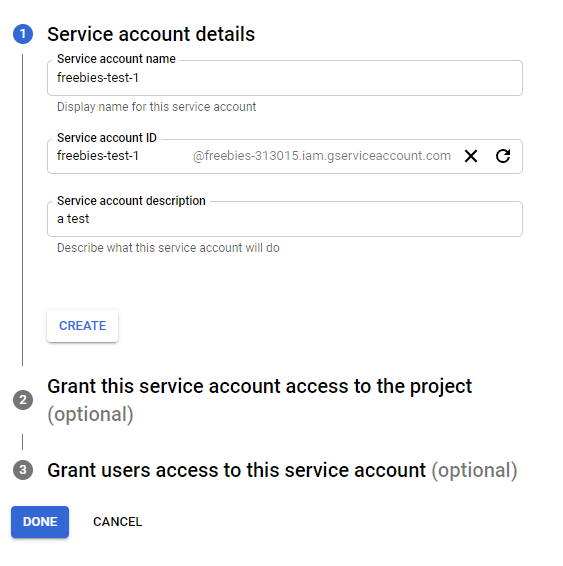
Fill in the required information. then press create
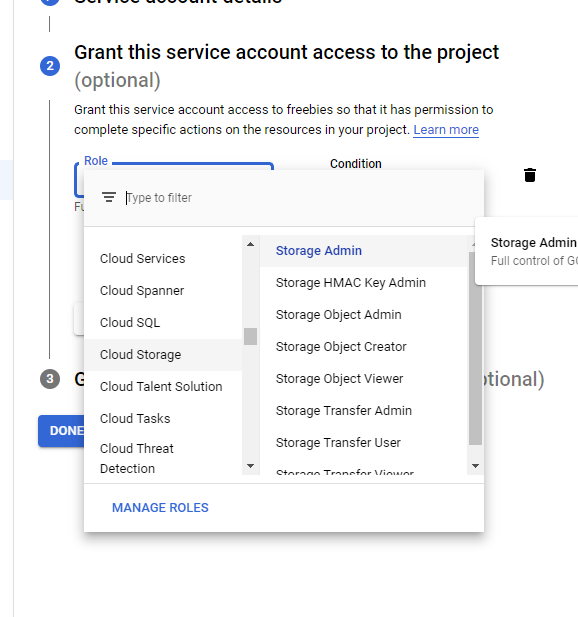
Create a new role and assign it as Cloud Storage -> Storage Admin
Press next and click done. Back in the API & Services dashboard you should find the new service account.

Click on the newly created Service Account, then goto Keys and Add Key
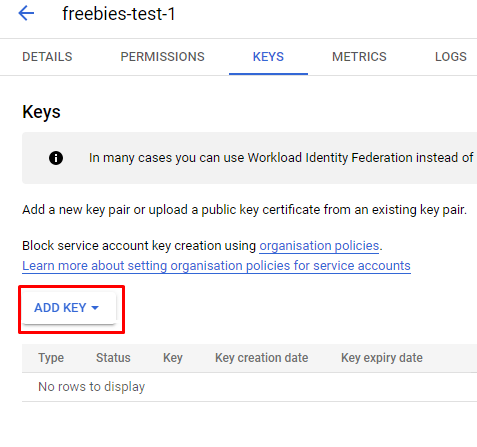
Create the key in JSON format and click Create.
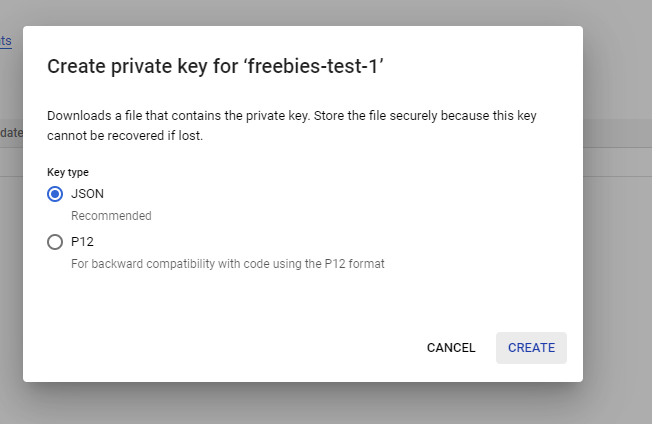
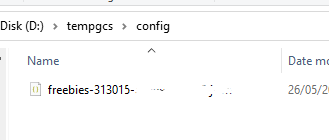
Now you should be prompted with a dialog box to save the service account credential, create a folder in the project root called config and save the credential there.
Next step is to utilize the credential, in the config folder create a
index.jsand write the following.const Cloud = require("@google-cloud/storage") const path = require('path') const serviceKey = path.join(__dirname, './<path-to-credential.json>') const {Storage} = Cloud const storage = new Storage({ keyFilename : serviceKey, projectId : '<project id>' }) module.exports = storageDo not forget to change the credential path and also the projectId.
After credential is setup, we need to create an upload helper. Create a helpers in the root of your project and then create
helpers.jsinside. So far your project structure should look something like this.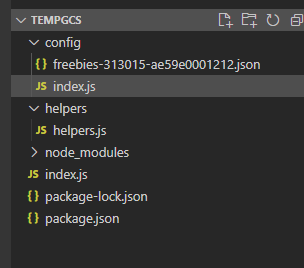
Write the following code in
helpers.jsconst util = require('util') const gc = require('../config') const bucket = gc.bucket('<your-bucket-name>') exports.uploadImage = (file) => new Promise((resolve, reject)=>{ const {originalname, buffer} = file const blob = bucket.file(originalname.replace(/ /g, "_")) const blobStream = blob.createWriteStream({ resumable: false }) blobStream.on('finish', ()=> { const publicUrl = util.format( `https://storage.googleapis.com/${bucket.name}/${blob.name}` ) resolve(publicUrl) }).on('error', (err)=> { console.log(err) reject(`Unable to upload iamge, something went wrong`) }) .end(buffer) })Do not forgot to replace the bucket name with your bucket.
Require the
uploadImage()that we recently create inindex.jsconst { uploadImage } = require('./helpers/helpers')Finally we just need to update our
/uploadsendpoint into.app.post('/uploads', async (req, res, next) => { try{ const myFile = req.file const imageUrl = await uploadImage(myFile) res.status(200).json({ message : "Upload succeed", daat : imageUrl }) }catch(err){ next(err) } })To run the app simply use
node index.jsYou could nodemon to make the development process easier.
Testing the Endpoint
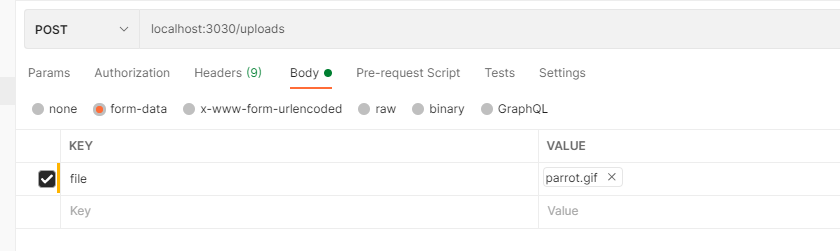
To test the upload, run the app.
If you are using postman, you could try this request.
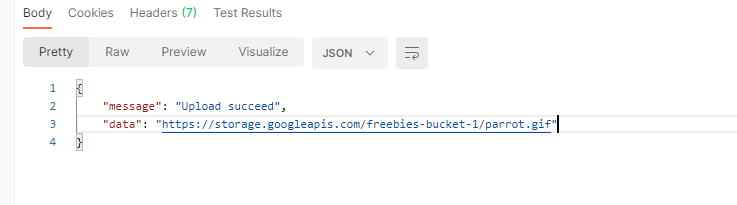
If everything is working correctly, you should get this return.
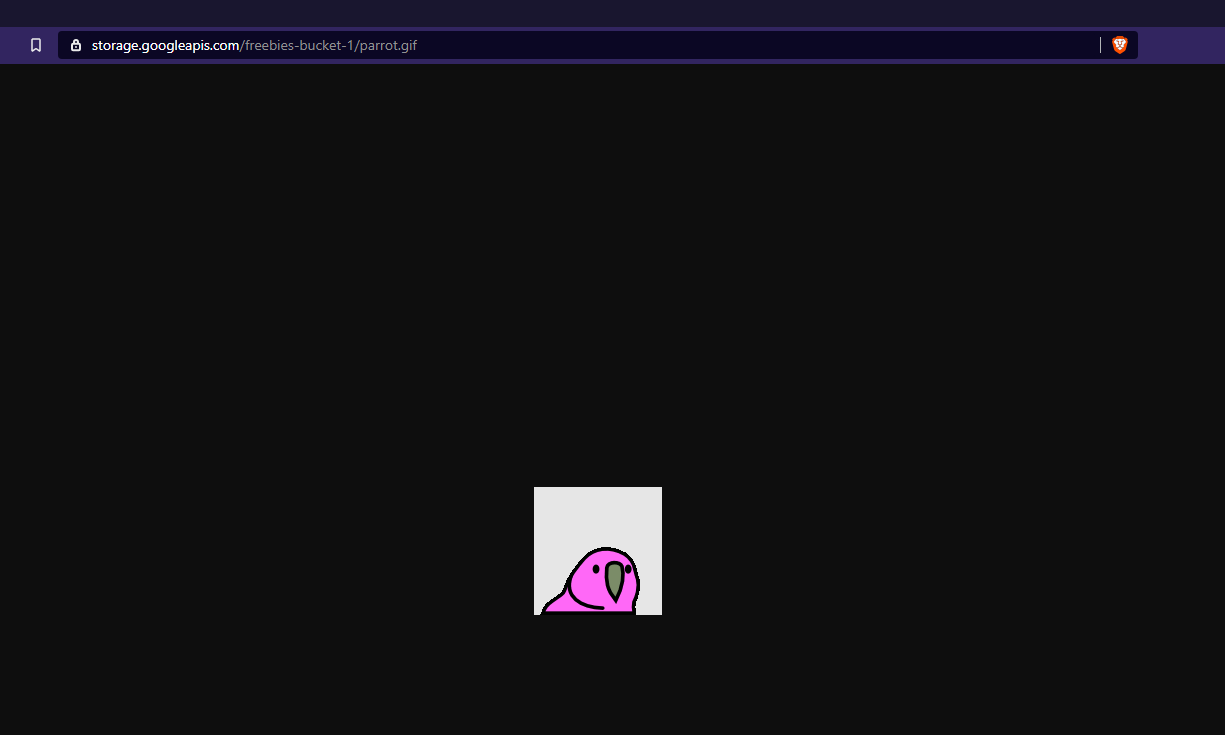
Now if you acces the url using private browser, you should be able to receive and see the image.
And it is done! Thankyou you so much for reading the article and i hope this small article could help you! If you have any question you could ask it in the disqus comment section or directly message me in instagram or twitter @arifluthfi16. See you in the next one!
Here is some parrot.

Source Codes
Here is the link to source code, please note that i remove the credential config. So it will not work instantly when you run it.