Introduction
Docker is a really convenience tool to use either in development or production environment. When we develop something as a team we often encounter the case it worked on my system by using docker we can reduce this by a great amount. It makes development and deployment to production far way easier.
Here in this article we will discuss how can we start a NodeJS - Express project in a docker environment. we will also link our app with 2 database : redis & mysql. before we start to develop the app there are few things that you need to prepare :
Prerequisite :
- Make sure nodejs are installed in your system.
- Make sure that you have docker installed.
- A good internet connection (needed to download docker images).
- Have mysql and redis running locally on your system.
The Steps :
To make things extra clear, here is what we will do :
- We will initiate our project and develop the express app locally.
- We will make docker image for.
Creating Project Locally
Initiating the Project
As every other nodejs project we will have to initiate the project and install some dependencies :
$ npm init --y
Some tip you could skip all the new project input by using the flag –y. next step we need to install some dependencies, since we will work with mysql and redis, we need to install the library to work with them :
$ npm install express promise-mysql redis
Writing the NodeJS App
App Boilerplate
Right now you should have a project structure like this :
root
`-- app
    |-- node_modules
    |-- package-lock.json
    `-- package.json
The next step will be adding start and dev script to package.json file, for the dev command we will be using nodemon this will make development easier later on.
...
"scripts": {
    "test": "echo \"Error: no test specified\" && exit 1",
    "start" : "node index.js",
    "dev" : "nodemon index.js"
},
...
Create an index.js file, this file will act as our starting point of the app. Next we create a basic app that listen to the port 3000, for now we will make the port static.
// app/index.js

const express = require('express')

const app = express()
const port = 3000

app.get('/', (req,res)=>{
    res.send("Ok")
})

app.listen(port, ()=>{
    console.log(`App is listening on port ${port}`)
})
Simply start the app by using npm start and create a request to localhost:3000 it should return ‘Ok’. So far you should have a project structure like this :
root
`-- app
    |-- index.js
    |-- node_modules
    |-- package-lock.json
    `-- package.json
Writing the data service
Now we will be writing the service to create and get data to the local mysql database. create a directory services in the root of app. first we need to prepare the database and the table we are going to write to, for the sake of simplicity we will make an animal database with only name and description. Here are the sql script that you could run :
CREATE DATABASE IF NOT EXISTS `animal`
USE `animal`;

CREATE TABLE IF NOT EXISTS `animal_info` (
  `name` varchar(50),
  `description` text
) ENGINE=InnoDB;
Creating the controllers
Create a new file called data.js inside service directory, here we will create a 2 controller that used to insert and get the data.
var mysql = require('promise-mysql');

const getConnection = async () => {
    return mysql.createConnection({
        host     : 'localhost',
        user     : 'root',
        password : 'root',
        database : 'animal',
        port     : 3306
    });
}

exports.insertAnimal = async (req,res) => {
    try{
        const {name, description} = req.body;
        const conn = await getConnection();

        let result = await conn.query(`INSERT into animal_info values ('${name}', '${description}')`);

        res.send({
            msg : "Succesfully insert a new record",
            data : {
                name,
                description
            }
        })
    }catch(error){
        res.status(400).send({
            msg : "Error occured",
            error
        })
    }
}

exports.getAnimal = async (req,res) => {
    try{
        const {name} = req.params;
        const conn = await getConnection();

        let result = await conn.query(`SELECT * FROM animal_info WHERE name='${name}'`);

        res.send({
            data : result
        })
    }catch(error){
        res.status(400).send({
            msg : "Error occured",
            error
        })
    }
}
Implementing the controller
// app/index.js

const express = require('express')
const {insertAnimal, getAnimal} = require("./service/data")

const app = express()
const port = 3000

app.use(express.json())

// Middlware to log every requesting coming in
app.use((req,res,next)=>{
    const date = new Date(Date.now());
    console.log(`${req.method} ${req.url} Requested at ${date.toISOString()}`)
    next()
})

app.get('/', (req,res)=>{
    res.send("Ok")
})

app.post("/animal", insertAnimal)
app.get("/animal/:name", getAnimal)


app.listen(port, ()=>{
    console.log(`App is listening on port ${port}`)
})
There are few points that we made here :
- We implement a middleware to log every request that comes in
- We implement 2 new routes with the corresponding controller to insert and get new animal records.
Testing The Endpoints
You should be able to request to the end point, by using postman or curl to these urls :
GET /animal/:name

POST /animal
Writing the caching service
Once again we will be creating a new file called cache.js inside the service directory. For the sake of simplicity we will not do any error handling mechanism since the system will work fine if it failed to read cache.
// app/service/cache.js

const redis = require("redis")
const { promisify } = require("util");

const rdb = redis.createClient({
    port      : 6379,
    host      : 'localhost',
});

// The redis lib is callback based so we need to make it promise
const getAsync = promisify(rdb.get).bind(rdb);
const setAsync = promisify(rdb.set).bind(rdb);

exports.createCache = async (key, data) => {
    const result = await setAsync(key, data)
    return result
}

exports.getCache = async (key) => {
    const result = await getAsync(key);
    return result
}
Now we need to implement the service to our data controller. for the sake of simplicity we will directly implement the caching to the controller. there is much better way such as implementing the caching as a middleware so we can achieve more maintainability and much less complexity.
Implement caching to the controller
So far if you follow along your project should look something like this.
root
`-- app
    |-- index.js
    |-- node_modules
    |-- package-lock.json
    |-- package.json
    `-- service
        |-- cache.js
        `-- data.js
In the top of data.js add
const {createCache, getCache} = require("./cache")
Then modify exports.getAnimal to
exports.getAnimal = async (req,res) => {
    try{
        const {name} = req.params;
        let data, message;
        // Get cache
        data = JSON.parse(await getCache(name));
        if(data){
            message = "Result are returned from cache"
        }else{
            const conn = await getConnection();
            data = await conn.query(`SELECT * FROM animal_info WHERE name='${name}'`);
            message = "Successfully get the data from database"
            await createCache(name, data)
        }
        res.send({
            message,
            data
        })
    }catch(error){
        console.log(error)
        res.status(400).send({
            msg : "Error occured",
            error
        })
    }
}
In the code above we check is a cache with key name exists, if the cache exists we will parse the return data and set the message to Result are returned from cache if there are no cache we will load the data normally and then create a new cache using name as the key.
The code might be a little bit messy but it does it’s job well. In the next step we will start to dockerize our whole project and move our database from local to the docker container.
We will create an image of our app, then containerize our app & databases.
Dockerizing the Project
After we finish creating and running our app in the local environment it is time to start dockering the project for more flexibility.
Creating Docker Image for the App
In this process we will create a Dockerfile of our app that will be used to create the docker image. Simply a Dockerfile contain a blueprint or a step by step process about how we will deploy our project.
First create a Dockerfile in the root of /app, then write the following.
# app/Dockerfile

FROM node:16-slim

WORKDIR /app

COPY ["package.json", "package-lock.json*","./"]

RUN npm install

COPY . .

CMD ["npm", "start"]
Details
FROM node:16-slim
In the first line of docker file we specify the base image that will be used for our docker image. I choose node:16-slim which mean node 16 slim version, usually slim version have much smaller size. This fits our needs well.
WORKDIR /app
From the documentation we know that
The WORKDIR instruction sets the working directory for any RUN, CMD, ENTRYPOINT, COPY and ADD instructions that follow it in the Dockerfile. If the WORKDIR doesn’t exist, it will be created even if it’s not used in any subsequent Dockerfile instruction.
This simply means that every next RUN, CMD, ENTRYPOINT, COPY and ADD command will be executed in that WORKDIR. So we don’t have to worry to manually mount our directory when doing file operation.
COPY ["package.json", "package-lock.json","./"]
This command simply copy the package.json & package-lock.json to the ./ or the root of our WORKDIR.
RUN npm install
This command will execute npm install from our WORKDIR
COPY . .

CMD ["npm", "start"]
Wrapping things up, the first command will copy whole current directory to the root of our workdir, and then after everything is completed docker will execute npm start.
You might think that ‘Wait isn’t we already copy the package.json and run npm install’ , aren’t we supposed to have a node_modules directory in our image already?? Then why are we copying all the data over again?? Calm down, the last step is to create a .dockerignore file this work similarly to a .gitignore file.
Create the .dockerignore file at the same level of Dockerfile, then
# app/.dockerignore

node_modules
This will simply blocks node_modules from Dockerfile command so we don’t have to worry to accidentally copy the node_modules over again.
Try Build & Run the App Image
To build the image you could simply run
$ docker build -t docker-node-db:latest .
And you should get an output similar to this
Y@DESKTOP-JFCIO3N MINGW64 /d/Code/NodeJS/docker-nodejs-db/root/app
$ docker build --tag docker-node-db:latest .
[+] Building 21.7s (11/11) FINISHED
 => [internal] load build definition from Dockerfile                                                   0.1s
 => => transferring dockerfile: 183B                                                                   0.1s
 => [internal] load .dockerignore                                                                      0.1s
 => => transferring context: 52B                                                                       0.0s
 => [internal] load metadata for docker.io/library/node:16-slim                                       13.6s
 => [auth] library/node:pull token for registry-1.docker.io                                            0.0s
 => [1/5] FROM docker.io/library/node:16-slim@sha256:2cc239701e22ed59a2c918f4ba3625a3516b461010b5ce25  0.0s
 => [internal] load build context                                                                      0.5s
 => => transferring context: 23.42kB                                                                   0.4s
 => CACHED [2/5] WORKDIR /app                                                                          0.0s
 => [3/5] COPY [package.json, package-lock.json*,./]                                                   0.2s
 => [4/5] RUN npm install                                                                              6.5s
 => [5/5] COPY . .                                                                                     0.2s
 => exporting to image                                                                                 0.4s
 => => exporting layers                                                                                0.4s
 => => writing image sha256:e017eaca0d27cf4bc1580261f86d4c80e259443760ec0bbb88ec7fb3729a4f3b           0.0s
 => => naming to docker.io/library/docker-node-db:latest
Then you could try to run the app by
$ docker run docker-node-db
You will be able to run the image but it is expected for you to encounter error, because we haven’t setup any database for the container to connect to.
Composing the App & Databases
We could make & setting individual container of our databases, but it will be so much hassle to do. From now on we will be using Docker Compose, it will help you a lot with automating entire process of developing a project in docker. So far you should have a project structure like this.
root
`-- app
    |-- Dockerfile
    |-- index.js
    |-- node_modules
    |-- package-lock.json
    |-- package.json
    `-- service
First we need to make docker-compose.yml & .env file on the root of our project. You should have something like this
root
|-- app
|   |-- Dockerfile
|   |-- index.js
|   |-- node_modules
|   |-- package-lock.json
|   |-- package.json
|   `-- service
`-- docker-compose.yml
`-- .env
In the docker-compose.yml file. I Highly recommend you to look up for prior resource about docker & docker compose before digging into the docker-compose.yml
version : "3"

services :
    db :
        image : mysql
        command: --default-authentication-plugin=mysql_native_password
        volumes:
            - docker-nodejs-mysql:/var/lib/mysql
        environment:
            MYSQL_ROOT_PASSWORD: ${DB_PASSWORD}
        restart: always
        env_file :
            - ./.env
        ports :
            - 3310:3306

    rdb :
        image : redis
        ports :
            - 6381:6379

    app:
        build : ./app
        volumes :
            - ./app:/app:rw
        ports :
            - ${EXPOSED_APP_PORT}:${APP_PORT}
        env_file :
            - ./.env
        command : ["npm", "run", "dev"]
        depends_on :
            - db
            - rdb
volumes:
    docker-nodejs-mysql:
And fill the .env file with
APP_PORT=3000

DB_PASSWORD=example

MYSQL_DOCKER_HOST_NAME=db
REDIS_DOCKER_HOST_NAME=rdb
Explanation
In the docker-compose.yml we define what kind of docker compose version that we wanted to use from the
version : "3"
And then we define what services that will be running, here we have 3 service db for mysql server rdb for the redis server and then app for our app.
services :
	db:
	rdb:
	app:
In the db service we define that our db :
- Use mysql image, since we don’t specify any tag it will use the latest one.
- The next line is making sure that we are using mysql native authentication rather the new one.
- We create a volume called
docker-nodejs-mysqland target/var/lib/mysqlin the container - Next one we setup a environment variable for mysql, here we setup the
MYSQL_ROOT_PASSWORDthat will be used to login to our root account later - Define the container to restart when something happen to the container.
env_filehere we simply define that we will use the.envfile in the same directoryportsand finally we expose3306port in the container to3310in the host machine, by doing so we can access our database later onlocalhost:3310
	db :
        image : mysql
        command: --default-authentication-plugin=mysql_native_password
        volumes:
            - docker-nodejs-mysql:/var/lib/mysql
        environment:
            MYSQL_ROOT_PASSWORD: ${DB_PASSWORD}
        restart: always
        env_file :
            - ./.env
        ports :
            - 3310:3306
In the rdb service we define that :
- We use latest redis image
- We expose the port
6379in container to6381in host machine.
	rdb :
        image : redis
        ports :
            - 6381:6379
Lastly in the app service we define :
buildrather thanimagehere we specify that we will build an image. Here we target theDockerfilewithin our/appdirectory,volumes, we create a bind mount between our host machine/appwith container/appand giving it a:rw(read write flag). By doing so we can modify our source code and then directly running it without needing to rebuild the image. Of course we did this because this is a development environment.portsas usual we expose a port from the container to our host. Rather than hardcoding the ports right now we are loading the port configuration from the.envenv_filehere we simply define that we will use the.envfile in the same directory.commandthis command will run to run the container in development mode.depends_onthis make sure that other service is running before the app.
	app:
        build : ./app
        volumes :
            - ./app:/app:rw
        ports :
            - ${EXPOSED_APP_PORT}:${APP_PORT}
        env_file :
            - ./.env
        command : ["npm", "run", "dev"]
        depends_on :
            - db
            - rdb
And lastly, here we simply declare that we will have a volume called docker-nodejs-mysql docker will create the volume if it does not exists.
volumes:
    docker-nodejs-mysql:
So far, you should be ok. and you can run the entire project by running docker-compose up. from the root directory where your docker-compose.yml is. If there is no error then you are good to go. Even though you might find some error when trying to connect to the service. It is because we still haven’t configure our code to utilize the environment variable and connect to other containers. Here is few extra modification to the code. Before editing the code i suggest to run your docker with docker-compose up so you could see the hot reload in action!
Most of the modification are just pulling env variables and using it.
// app/index.js
...

const APP_PORT = process.env.APP_PORT
const EXPOSED_APP_PORT = process.env.EXPOSED_APP_PORT

...

app.listen(APP_PORT, ()=>{
    console.log(`App is listening on port ${APP_PORT} and exposed to ${EXPOSED_APP_PORT}`)
})
Here in the data.js we need to change the host to match with the service name we created in our docker-compose.
// app/services/data.js
...

const MYSQL_DOCKER_HOST_NAME = process.env.MYSQL_DOCKER_HOST_NAME
const DB_PASSWORD = process.env.DB_PASSWORD

const getConnection = async () => {
    return mysql.createConnection({
        host     : MYSQL_DOCKER_HOST_NAME,
        user     : 'root',
        password : DB_PASSWORD,
        database : 'animal',
        port     : 3306
    });
}

...
And same thing happen in our cache.js
// app/services/cache.js
...

const REDIS_DOCKER_HOST_NAME = process.env.REDIS_DOCKER_HOST_NAME

const rdb = redis.createClient({
    port      : 6379,
    host      : REDIS_DOCKER_HOST_NAME,
});

...
Some Error you Might Encounter
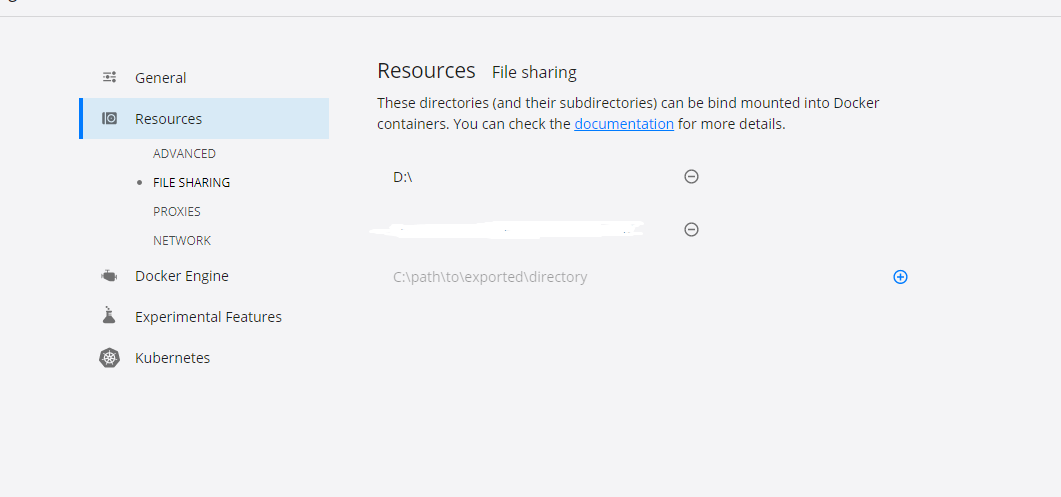
Windows file sharing, if you are on windows you might encounter error when you are trying to bind a directory to docker container. To fix this issue simply add new resource file sharing target in your docker desktop setting. you could target specific directory but in my case for the sake of simplicity I target my whole partition.
nodemon not found, if tried to run directly after you clone the repository. It might show error ‘nodemon not found’ for this issue please refer to : https://stackoverflow.com/questions/33663496/docker-bin-bash-nodemon-command-not-found
Final Words & Source Codes
All should be set and your application are good to go for development, I really hope this short article could help you to understand more about docker. This article may have been poorly written and have few holes in it. So please if you have any comments or critique or maybe you have some error you could hit me up on my twitter or instagram -> @arifluthfi16. Thankyouu so much!!!
All Source code all available here :
https://github.com/arifluthfi16/nodejs-docker-mysql-redis
Database Structure (Extra)
Here is the ddl for our database (almost forgot).
CREATE DATABASE IF NOT EXISTS `animal
USE `animal`;

CREATE TABLE IF NOT EXISTS `animal_info` (
  `name` varchar(50),
  `description` text
) ENGINE=INNODB;